
Installing solar panels on your roof can sound a bit daunting, but it’s really a straightforward process. Here’s a simple breakdown to help guide you through it. First things first, make sure your roof is in good shape and can handle the weight of the panels. If it has leaks or needs repairs, take care of that before anything else.
Next up, gather your materials. You’ll need solar panels, mounting brackets, an inverter, and the right tools like a drill and a wrench. You can find kits that include everything you need, which makes life a lot easier. Once you have everything ready, it’s time to start the installation!
Start by installing the mounting brackets according to the layout you’ve chosen. Make sure they’re secure and level, as they’ll hold your panels in place. After that, attach the solar panels to the brackets. This usually involves sliding them into place and securing them with bolts. Keep it tight, but be careful not to overdo it.
Once the panels are secure, connect them to the inverter. This step is key because the inverter converts the solar energy into usable electricity for your home. Follow the wiring instructions provided with your panels to make sure everything is hooked up correctly. Lastly, don’t forget to check if you need any permits or inspections based on local regulations. You want everything to be compliant!
Essential Tools for Your Solar Installation
When you're diving into the world of installing solar panels on roof, having the right tools is a game changer. You want to make sure you’ve got everything you need before climbing up there. Nobody wants to make multiple trips to the hardware store when they could be basking in the sun.
First up, you’ll need a sturdy ladder. A good ladder gives you the confidence to reach your roof safely. Look for one that’s rated for your height and can support your weight. Safety first, right?
Next, a power drill is essential for making those mounting brackets secure. Go for a cordless one if you can. It offers more freedom to move around without worrying about cords getting in the way. Don’t forget to grab some strong screws or bolts too; you want everything to stay put when windy days hit.
Another must-have is a measuring tape. Accurate measurements prevent any cutting or installation mistakes. You’ll thank yourself later when everything fits just right. Also, consider a level. It helps you make sure your panels are positioned perfectly. No one wants to deal with uneven panels—it’s just not a good look!
Lastly, solar panel connectors make your life easier when it comes to wiring. They’ll streamline the connection process and ensure everything is secure and weatherproof. Having these tools at hand will make installing solar panels on roof a whole lot smoother and way more enjoyable.
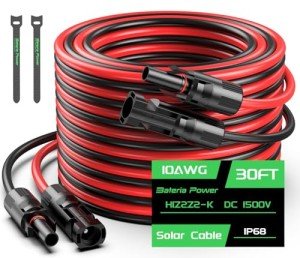
30FT 10AWG Solar Panel Extension Cable Set
Ideal for connecting your solar panels to your power system with ease and efficiency
Product information
$39.98 $37.99
Product Review Score
4.96 out of 5 stars
96 reviewsProduct links
Troubleshooting Common Installation Issues
Installing solar panels on your roof can be a game changer, but sometimes things don't go as smoothly as planned. Let’s tackle some common issues you might run into during installation.
First up, is misalignment. If your panels don’t sit straight, it can affect their efficiency. Make sure you double-check the measurements before securing anything down. Use a level to ensure everything lines up correctly. A small mistake can lead to big problems later on!
Next, watch out for roof obstructions. Things like chimneys, vents, or trees might cast shadows on your panels. This can significantly reduce energy output. Take a good look around and plan accordingly. If you can, trim back any branches or choose an installation position that avoids shading.
Lastly, don't ignore wiring issues. If your panels aren’t producing energy, it might be a wiring problem. Check all connections to ensure they’re tight and secure. If you notice frayed wires or any damage, replace them right away to keep your system running smoothly.
When you're installing solar panels on your roof, being aware of these potential pitfalls can save you time and energy down the road. Keep it simple, and don’t hesitate to ask for help if you run into trouble!
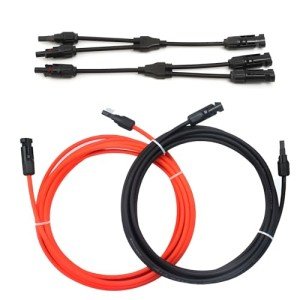
10FT Solar Extension Cable with Connectors and Y Adaptor
Extend your solar reach easily with this durable 10FT cable and handy Y adaptor
Product information
$19.99 $17.99
Product Review Score
4.16 out of 5 stars
26 reviewsProduct links
Tips for Maximizing Solar Efficiency
First off, think about the orientation of your panels. Ideally, you want them facing south to capture the most sunlight throughout the day. If you're in the northern hemisphere, this angle can really boost your energy production. Remember to consider any obstructions like trees or buildings that might create shade. No one wants to deal with reduced efficiency because of a nearby tree!
Next up, keep those panels clean. Dust, dirt, and bird droppings can really dim their performance. A quick wash a couple of times a year should do the trick. If you live in a particularly dusty area, more frequent cleaning might be necessary. It can feel a little tedious, but it’s worth it when you see those energy savings.
Another key factor is ensuring your solar inverter works efficiently. It’s the part that converts solar energy into usable electricity. Check the inverter regularly to make sure it’s running smoothly. If you notice any weird noises or if the lights aren’t functioning as they should, it might be time for a checkup. You don’t want any surprises!
Lastly, don't overlook optimizing your energy usage. Installing smart home tech can help you track your energy consumption and adjust to make the most of what your solar panels produce. Being aware of when to run your high-energy appliances can lead to even bigger savings. By being smart about your usage, you're making your solar investment work harder for you.


