
Getting your tools ready is the first big step in your solar panel installation journey. You want to make sure you have everything you need before you climb up to the roof. Here’s a quick checklist to help you get started:
With the right tools at your side, you’ll breeze through the solar panel installation process. Make sure everything is in good condition, and double-check that you have everything laid out before you start. It saves time and energy!
If you feel like something’s missing, don’t hesitate to swing by your local hardware store. Getting your hands on quality tools will make a world of difference. So, gear up, and let’s get those solar panels installed!
Find the Perfect Spot
Finding the right spot for your solar panels is crucial for a successful solar panel installation. It’s all about maximizing sunlight without any pesky obstacles getting in the way. Start by surveying your roof or yard and look for areas that get plenty of sunlight throughout the day. Keep an eye out for things like tall trees, buildings, or even that old garden shed that could cast shadows when the sun is shining brightly.
If you’re using your roof for solar panel installation, remember that a south-facing slope usually does the trick, especially if you live in the northern hemisphere. But don’t sweat it if your roof faces east or west; you can still make it work. Just make sure to think about how the sun moves across the sky and how that sunlight hits your roof at different times of the year.
Don’t forget to check the angle of your roof. The pitch can have a big impact on how much power your panels generate. A tilt of around 30 degrees usually gets the most sun exposure, but even a flat roof can be suited for solar panel installation with a little creative mounting. If your space doesn’t have the ideal angle, adjustable mounting options can help you optimize sunlight capture.
Finally, consider how easy it is to access your panels for maintenance. You want a spot that allows you to clean them off or check for any issues without tearing your whole yard apart. A moment spent planning the location pays off in the long run, leaving you with a smooth solar panel installation process and a setup that works seamlessly for years to come.
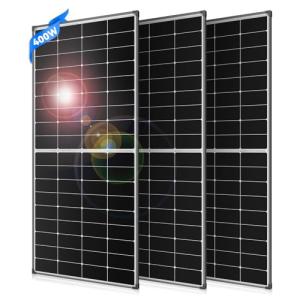
High Efficiency 400W Monocrystalline Solar Panel
Get reliable energy for your home with this powerful and efficient solar panel
Product information
$879.99
Product Review Score
4.97 out of 5 stars
176 reviewsProduct links
Step by Step Installation Guide
Getting started with your solar panel installation can feel a bit overwhelming, but don’t worry! I’ll walk you through the steps so you can tackle this project with confidence. First things first, gather all your tools and materials. You’ll need solar panels, a mounting system, wiring, an inverter, and safety gear. Having everything on hand will save you time and make the process smoother.
Next, it’s time to find the perfect spot for your panels. Look for an area that gets plenty of sunlight throughout the day, ideally south-facing if you’re in the northern hemisphere. Take into account any nearby trees or buildings that might cause shade. Once you’ve settled on a location, it’s crucial to check if you need any permits or approvals from your local authorities since solar panel installation might have specific regulations.
After you’ve secured the go-ahead, start with the mounting system. This is what holds your solar panels in place, so make sure it’s sturdy and well-installed. Use a level to ensure everything is straight. Once the mounts are secure, you can attach the solar panels. Don’t forget to connect the wires correctly—following the manufacturer’s instructions here is key! If you're unsure, there are plenty of helpful videos online that show this part in detail.
Finally, it's time to set up the inverter. The inverter converts the direct current produced by your panels into alternating current for your home. Follow the instructions closely, and connect it to your house’s electrical system. If you feel uncertain at any point, calling a professional is a smart move. After everything’s hooked up, turn on your system and watch your energy savings begin!
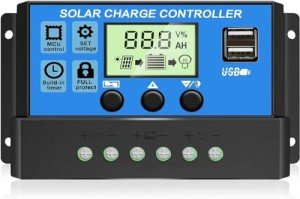
30A Solar Charge Controller with Dual USB Ports
Power up your devices efficiently while keeping your batteries charged and ready to go
Product information
$11.98
Product Review Score
4.97 out of 5 stars
161 reviewsProduct links
Tips for a Successful Setup
Setting up your solar panels can feel like a big task, but don't worry! Here are some tips to make your solar panel installation a breeze.
First off, pick the right location for your panels. You want a spot that gets a lot of sunlight throughout the day. Make sure to avoid any shady areas from trees or nearby buildings. Sunlight is your best friend when it comes to solar panel performance!
Next, check your roof condition. If your roof needs repairs, take care of those before the installation. You don’t want to set up solar panels on a roof that might need fixing soon—it can be a real hassle to remove and reinstall them later.
Gather the right tools ahead of time. A ladder, screwdriver, and a drill are often necessary for a smooth solar panel installation. Having everything ready means you won't have to stop halfway through to look for what's missing.
Lastly, don't hesitate to reach out for help if you need it. Whether it’s friends or professionals, having an extra set of hands can make the install go quicker and smoother. Once everything's set up, you'll be excited to see your energy savings roll in!


