
Thinking about diving into solar panel installation? You’re in the right place! It’s easier than you might think, and getting started can save you money while helping the planet. Let’s break it down.
First up, you’ll want to assess your home’s energy needs. Check your monthly electricity bills to figure out how much power you use. This gives you a target to aim for when choosing solar panels. You’ll also need to consider the space on your roof or yard—make sure it gets plenty of sunlight during the day. A shady spot might not cut it!
Next, you should familiarize yourself with the types of solar panels available. There are a few options out there: monocrystalline panels, which are super efficient; polycrystalline panels, which are a bit more affordable; and thin-film panels, which are lightweight and flexible. Each type has pros and cons, so pick one that matches your budget and energy goals.
Once you’ve got the basics down, it’s time for the fun part—installation! You can choose to do it yourself if you're handy, or hire professionals who can handle solar panel installation for you. If you go the DIY route, make sure to follow all safety guidelines and local regulations. It’s important to get it right, so your system works efficiently.
After you’re all set up, keep an eye on your solar panels' performance. Many systems come with monitoring apps that let you track how much energy you’re producing and saving. Remember, solar panel installation isn’t just about saving money; it’s about making a positive impact on the environment. Enjoy your new energy source!
Tools You Need for Installation
When it comes to solar panel installation, having the right tools can make all the difference. You don’t want to spend your time running around looking for a wrench or missing a crucial piece. Here’s a quick list of the essential tools you'll want to have on hand before you get started.
First up, you’ll need safety gear. This includes:
Next, you’ll definitely want some basic tools. Make sure to grab:
Lastly, consider having some additional handyman tools. These are great for getting the job done smoothly:
With these tools ready for your solar panel installation, you’ll be well-equipped to tackle the project efficiently. Happy installing!
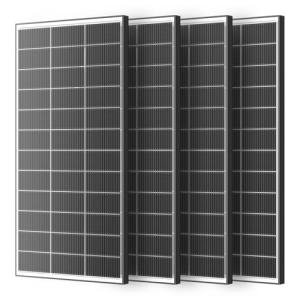
300W Bifacial High Efficiency Monocrystalline Solar Panel
Unlock the power of the sun with this efficient and reliable solar panel designed for maximum energy production
Product information
SGD 981.05
Product Review Score
4.54 out of 5 stars
217 reviewsProduct links
Step by Step Installation Guide
Installing solar panels might sound tricky, but it’s totally doable! Let’s break down the steps for you. Grab your tools, and let’s get started!
Step 1: Gather Your Materials
Step 2: Choose the Right Spot
Pick a sunny spot on your roof or property. Make sure there are no tall trees or buildings blocking the sunlight. Your solar panel installation needs direct sunlight to work efficiently!
Step 3: Install Mounting Brackets
Secure the mounting brackets to your surface, ensuring they are level. This will hold your panels in place. A friend can help hold them so they don’t move while you drill.
Step 4: Attach Solar Panels
Now it’s time to connect the solar panels to the brackets. Follow the manufacturer’s instructions carefully. Ensure everything is tight and secure to withstand the wind and rain.
Step 5: Connect the Inverter and Wiring
Finally, connect your inverter and wiring. This step allows the solar energy to convert into usable electricity for your home. If this feels a bit too technical, don’t hesitate to call in a pro to help!
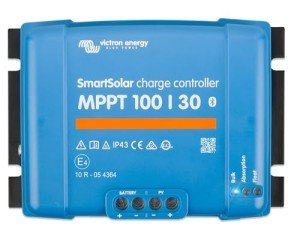
Victron Energy SmartSolar MPPT 100V 30A Charge Controller
Maximize your solar energy with this efficient and user-friendly charge controller
Product information
SGD 169.28
Product Review Score
4.46 out of 5 stars
217 reviewsProduct links
Tips for a Smooth Installation Process
Getting your solar panels up and running can feel a bit overwhelming, but don’t worry! A smooth Solar Panel Installation is totally doable with a little prep work. Here are some handy tips to help you out.
First things first, start by choosing a reliable installer. Do some research and read reviews. You want someone who knows their stuff and can guide you through the process. Get a few quotes and ask questions. This is all about finding someone you feel comfortable with.
Next, make sure your roof is ready for the installation. Give it a quick inspection. Look for any missing shingles or structural issues. If your roof needs repair, take care of that first. A solid base means a better installation in the long run.
Don’t forget about the paperwork! Check if you need any permits or local approvals before you begin the Solar Panel Installation. This step varies by location, so a little check now can save you a ton of hassle later. Your installer should be able to help you navigate this part.
Finally, be there on installation day! Keep an open line of communication with your installer. They might have questions or need to make some on-the-spot decisions. Being present means you can stay in the loop and ensure everything goes smoothly. You got this!


