
Are you thinking about solar panel installation? That’s awesome! Making the switch to solar can be a game-changer for your home and your wallet. It’s all about harnessing the power of the sun to generate your own electricity. Let’s make this journey simple and straightforward.
First things first, do your homework. Get to know the different types of solar panels out there. You’ve got monocrystalline, polycrystalline, and thin film. Each type has its perks, and the best choice depends on your home and budget. Don’t worry—it’s not rocket science!
Next, look into local incentives. Many places offer rebates or tax credits for solar panel installation. These can really help cut down your overall costs. You might be surprised at how much support is out there!
Once you’ve got the basics down, it’s time to find a good installer. Look for reviews from local customers and ask for estimates. A reliable installer will walk you through the process, making sure you’re comfortable every step of the way. Remember, your satisfaction matters!
As you prepare for your solar panel installation, keep an eye on your energy needs too. Check your monthly energy bills and figure out how much power you use. This info will help you choose the right system size and ensure you maximize your savings. Get ready to embrace a cleaner, greener future!
Key Tools You’ll Need
When it comes to solar panel installation, having the right tools can make a big difference. You don’t need to be a pro to get the job done, but being prepared definitely helps. Here are some key tools you’ll want to have on hand:
Having these tools ready will make your solar panel installation smoother and a lot less stressful. Plus, you’ll feel way more confident tackling your project!

Anker SOLIX PS400 Portable 400W Solar Panels
Power your adventures with reliable, compact energy wherever you go
Product information
$1,998.00
Product Review Score
4.97 out of 5 stars
13 reviewsProduct links
Step by Step Installation Guide
Ready to dive into solar panel installation? Don't worry; I've got your back! This step-by-step guide will make it as easy as pie. Let’s break it down together.
Step 1: Gather Your Tools and Supplies
Before you get started, make sure you have everything you need. Here’s a quick checklist:
Step 2: Choose the Right Spot
Location is key for effective solar panel installation. You want your panels to get plenty of sunlight. Look for a space on your roof or in your yard that’s not shaded by trees or buildings. A south-facing angle usually works best.
Step 3: Install the Mounting Brackets
Once you’ve got your spot, it’s time to attach the mounting brackets. These will hold your panels in place. Make sure they’re level and securely fastened to eliminate any wobbling. Don’t forget to check local regulations and consider hiring a pro if you're unsure!
Step 4: Connect the Panels and Inverter
Now comes the fun part! Connect your solar panels to the mounting brackets. Next, link the panels to the inverter. This piece changes the power from DC to AC, allowing you to use it in your home. Follow the instructions carefully—this part is crucial for safe and effective solar panel installation.
Step 5: Wiring and Final Touches
Finally, finish the wiring and double-check everything. Make sure there are no loose connections. Test your system to ensure it's working properly. Enjoy the benefits of harnessing the sun’s power!
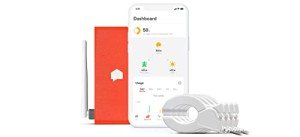
Sense Energy Monitor – Real-Time Solar and Usage Tracker
Keep tabs on your energy use and solar production effortlessly with this handy monitor
Product information
$349.00
Product Review Score
4.5 out of 5 stars
42 reviewsProduct links
Tips for a Smooth Setup
Getting your solar panels set up doesn’t have to be stressful. With a few simple tips, you can make the solar panel installation process smooth and hassle-free. First things first, pick a sunny spot. Solar panels love sunlight, so find the place with the least shade throughout the day. This way, you’ll maximize energy generation from the start!
Next, double-check your roof's condition. Make sure it’s sturdy enough to hold the panels for years to come. If there are any loose shingles or signs of damage, take care of those issues first. It’s way better to fix them now than to deal with repairs later on.
Gather all the necessary tools and materials before you dive into the installation. Having everything on hand will save you time and frustration. You’ll typically need brackets, mounting hardware, and an inverter. It’s also a good idea to have a helper. Two sets of hands can make the work much easier!
Finally, don’t rush things. Follow the installation instructions closely and take your time. If you’re feeling unsure about any step, don’t hesitate to reach out for help. Whether it’s a friend who’s done it before or a professional, getting guidance can make a huge difference. Taking it step by step helps ensure your solar panel installation goes off without a hitch!


