
Thinking about solar panel installation? You’re in the right place! It may sound complicated, but getting started is simpler than you think. Whether you want to save on energy bills or do your part for the planet, installing solar panels can be a fantastic choice.
First things first, check out your roof. Is it in good shape? Ideally, you want a sturdy roof with plenty of sun exposure. South-facing roofs usually get the most sunlight. If your roof needs repairs, handle that before moving forward with solar. You wouldn’t want to install panels only to have to take them down for maintenance!
Next, decide on the type of solar panel that fits your needs and budget. There are different options out there. Monocrystalline panels are efficient and great for limited space. Polycrystalline panels are a bit more affordable but might take up more room. Then there are thin-film panels, which can be flexible and lightweight. Think about what will work best for your situation.
Once you have your panels picked out, it’s time for installation. You can DIY if you’re feeling handy, but many people prefer to hire professionals. A pro can make sure everything is set up safely and correctly. Plus, they can help with any permits or paperwork needed for installation. Check for local incentives and rebates too; they can make a big difference in cost.
Finally, get excited about your switch to solar! After installation, you’ll start seeing the benefits almost immediately. Watch your energy bills drop and enjoy the peace of mind that comes with clean energy. Remember, solar panel installation is a big step, but it’s also a rewarding journey toward sustainable living!
Tools You Need for Installation
Installing solar panels can be a breeze if you have the right tools. Before you dive into your solar panel installation project, here’s a checklist of essential items you’ll need. Trust me, having these tools on hand makes everything smoother!
First off, grab a drill. A good drill is crucial for making holes in your roof or wall to secure the panels and brackets. Pair this with the proper drill bits for wood, metal, or concrete, depending on your roof’s material. It’s also helpful to have a level on hand. You want your panels to sit perfectly flat to maximize their efficiency.
Next, consider a wrench set and some screwdrivers. These will help you secure all the hardware. It's a good idea to have both Phillips and flat-head screwdrivers to avoid any frustrating last-minute trips to the store. Don’t forget a tape measure to ensure everything lines up just right.
Lastly, if you’re going up on your roof, safety is key! A harness can be a lifesaver if you’re working at heights. A good pair of gloves will protect your hands while you’re handling the panels and tools. Keeping everything safe and secure should be your top priority when it comes to solar panel installation.
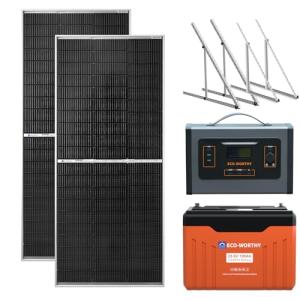
ECO-WORTHY 390W Off-Grid Solar Panel Kit
Get everything you need to harness the sun's energy efficiently and power your off-grid adventures
Product information
$1,299.99
Product Review Score
4.86 out of 5 stars
155 reviewsProduct links
Step by Step Installation Guide
Getting started with solar panel installation isn’t as tough as it sounds! Let’s break it down step by step. Whether you're a DIY pro or just starting out, these steps will help guide you along the way.
Step 1: Gather Your Tools
Before you dive in, make sure you have everything you need. Here’s a quick list:
Step 2: Choose Your Location
Pick a spot on your roof that gets plenty of sunlight. You want to avoid shaded areas from trees or buildings. The more sun your panels get, the better they'll work!
Step 3: Install the Mounting System
Secure the mounting brackets to your roof according to the manufacturer's instructions. Make sure they’re level and spaced out correctly. This is where your solar panels will rest, so it's crucial to get this part right.
Step 4: Connect the Panels
Now it’s time to lift those solar panels onto the mounts. Secure them with the provided hardware. Once they're in place, connect them with the wiring, ensuring that everything is tidy and safe.
Step 5: Hook Up the Inverter
Connect your panels to the inverter following the guidelines. The inverter converts the energy from solar panels into usable electricity for your home. Double-check all connections and make sure everything is secure.
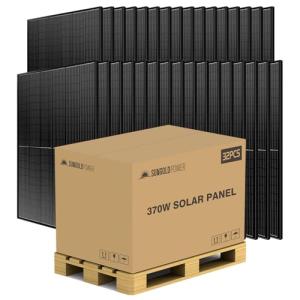
SUNGOLDPOWER 370W High Efficiency Solar Panels Set
Maximize your energy savings with these powerful and reliable solar panels
Product information
$4,287.80
Product Review Score
4.3 out of 5 stars
214 reviewsProduct links
Tips for a Smooth Setup
Setting up your solar panels doesn’t have to be a hassle. A little preparation goes a long way. Here are some tips to help make your solar panel installation as smooth as possible.
First, check your roof’s condition. Before you even think about installation, make sure your roof is in good shape. Look for any signs of damage or wear. If you need repairs, take care of those before the panels go up. It saves you time and money in the long run!
Next, research your local regulations. Different places have different rules about solar panel installation. It’s smart to reach out to your local authorities or look online for any permits you might need. You’ll want everything to be on the level from the get-go.
Don’t forget about the right tools. Make sure you have everything you need before you start. This could include a ladder, measuring tape, and any mounting hardware. Having all your tools handy can prevent those annoying trips to the hardware store.
Lastly, consider getting some help. While a DIY approach is great, don’t hesitate to call in a friend or a professional if you’re feeling stuck. Teamwork can make the solar panel installation process a lot easier and more fun!


