
Picking the right solar panels doesn't have to be stressful. With so many options out there, it can feel overwhelming, but we’re here to break it down for you. First up, think about your energy needs. How much power do you use? Understanding your energy consumption helps you find the right size and type of panels for your home.
Next, consider the efficiency of the solar panels. Not all panels convert sunlight to electricity at the same rate. You’ll want panels that provide good efficiency without breaking the bank. Look for options with a higher efficiency rating if you’re short on space. This way, you get maximum power without needing too many panels.
Don’t forget about durability and warranty. You want solar panels that can handle the weather and last a long time. Look for well-reviewed panels with solid warranties. If something goes wrong, you want to know you’re covered. A good warranty usually indicates that the manufacturer trusts their product.
And of course, keep your budget in mind. Some solar panels are more expensive upfront but can save you a lot in the long run. Do your homework on financing options and potential incentives in your area. When you're ready for the Solar Panel Installation, you'll want to feel confident you made the right choice!
Preparing Your Roof for Installation
Getting your roof ready for solar panel installation is super important. You want to make sure everything’s in tip-top shape before those panels go up. First things first, take a good look at your roof. Is it in good condition? If there are any leaks or damages, you’ll want to fix those before installation. It can save you a ton of headaches later!
Next, consider the angle and direction of your roof. Solar panels work best when they face south, with a good angle to catch the sun. If your roof doesn’t have the right angle, it may affect efficiency. But don’t stress too much; a good solar installer can help you find the best solution for your setup.
Also, check your roof’s material. Some materials might require extra work or special brackets for installation. For example, tile roofs need different mounting systems than asphalt shingles. It’s good to know what type of roof you have so you can communicate that with your installer.
Lastly, clear any obstacles, like overhanging branches or satellite dishes, around your roof. You want to make sure there’s nothing shading the panels. A clear path gives your solar panels the best chance to soak up that sun and keep your energy bills down. Simple, right? With a little prep, you’ll be one step closer to enjoying all the benefits of solar panel installation.
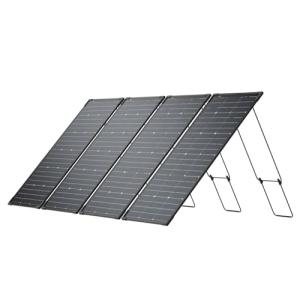
EF ECOFLOW 4-Pack 125W Bifacial Solar Panels
Get reliable power anytime and anywhere with this versatile set of solar panels
Product information
$659.00
Product Review Score
4.54 out of 5 stars
76 reviewsProduct links
Step by Step Setup Process
Setting up your solar panels may feel a bit daunting, but it’s really not that complicated. Just follow these steps for a smooth solar panel installation process!
First, find a good spot for your panels. Look for a place with plenty of sunlight and minimal shade. Roofs are popular, but ground-mounted options can work too. Don’t forget to check if you need any permits before you get started. Local regulations can differ, so a quick call to your town’s office can save you some headaches later on.
Next up, gather your materials. You’ll need solar panels, a mounting system, wiring, and an inverter. This equipment is essential for a complete solar panel installation. Make a checklist so you have everything ready before you dive in. Trust me, running back and forth to the store isn’t the best part of this project!
When you have your spot and materials ready, it’s time to mount the panels. Set up the mounting system according to the manufacturer’s instructions. Once that’s secure, attach your solar panels. Make sure they’re facing the right direction to capture the most sunlight!
The last step is connecting everything. Hook up your panels to the inverter, and then connect the inverter to your electrical panel. Ensure that all connections are secure and double-check your work. After that, you’re ready to flip the switch and enjoy the benefits of your solar panel installation! It’s a great feeling to see your energy bills drop while doing something good for the planet.

Jackery Explorer 2000 Plus Solar Kit with Batteries
Power your adventures and keep your devices charged with this all-in-one solar kit
Product information
$2,998.00
Product Review Score
4.81 out of 5 stars
231 reviewsProduct links
Maintenance Tips for Long Lasting Panels
Keeping your solar panels in good shape isn’t tough, and it pays off in the long run. Here are some easy maintenance tips to ensure those panels keep performing their best after your solar panel installation.
First up, give them a good cleaning now and then. Dirt, leaves, and other debris can block sunlight and reduce efficiency. A gentle wash with water and a soft brush every few months is usually enough. If you're in a dusty area or right under trees, consider cleaning more often. Just avoid abrasive materials that could scratch the surface.
Next, keep an eye on the angle of your panels. After your solar panel installation, you might need to adjust the tilt at some point to catch more sunlight. This is especially important with seasonal changes. If your system is mounted on a roof, just make sure it’s secure and hasn’t shifted due to weather or other factors.
Lastly, check your inverter’s performance. This little device converts solar energy into usable electricity. If your inverter light turns red or shows an error message, it’s time to investigate. Regular performance checks help catch any issues early, so your solar panel installation continues to work smoothly.


