
Choosing the right solar panels is key to making your solar panel installation a breeze. It’s all about figuring out what works best for your home and your energy needs.
First, consider your energy consumption. Check your electricity bills to see how much energy you use on average each month. This helps you determine how many solar panels you’ll need. The more energy you use, the more panels you’ll want to install. It’s all about matching your energy needs with panel output.
Next, take a good look at your roof. Is it shaded by trees or other buildings? A shady roof won’t get the sunlight it needs for optimal performance. You might need to trim some branches or even think about installing panels on a different part of your property if that's the case. It's all about positioning to catch those rays!
Don’t forget to check out different types of solar panels. There are monocrystalline, polycrystalline, and thin-film panels, each with pros and cons. Monocrystalline panels are super efficient and take up less space, while polycrystalline ones are usually a bit cheaper. Thin-film panels are portable and flexible but may not be as efficient. Pick what fits your situation best.
Finally, think about the warranty and durability of the panels. Most panels come with a warranty of 25 years or more, which is a good sign of quality. You want those panels to last, especially since solar panel installation is an investment in your home. Take the time to research and ask questions; it pays off in the long run!
Preparing Your Roof for Installation
Getting your roof ready for solar panel installation is a key part of making the switch to solar energy. You don’t want to skip this step because a solid roof means your panels will shine their brightest for years. Here’s how to make sure your roof is ready for those shiny solar panels.
First, check the overall condition of your roof. If it’s old and worn, replacing it before the solar panel installation is a smart move. Solar panels can last 25 years or more, so you want to make sure your roof can keep up for just as long. Look for missing shingles, leaks, or any other damage that could cause issues down the line.
Next, clear away any debris like leaves, branches, or dirt. A clean surface helps the installers do their job without any hiccups. Plus, debris can trap moisture, which isn’t ideal for your roof long-term. A good clean-up can really help in getting the most out of your solar panel installation.
Finally, think about the shade. Trees, nearby buildings, or even your own chimney can block sunlight from hitting the panels. If you can trim back some branches or even make a decision about planting new trees elsewhere, you’ll increase the efficiency of your solar power system. Getting plenty of sunshine is what it’s all about!
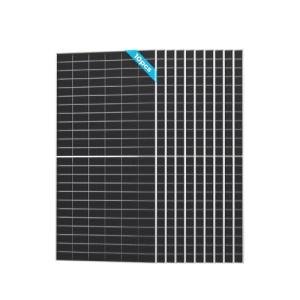
Renogy 590W N-Type Monocrystalline Solar Panel 10-Pack
Power your home and save on energy bills with this high-efficiency solar panel set
Product information
$4,499.99
Product Review Score
4.79 out of 5 stars
165 reviewsProduct links
Step by Step Installation Guide
Installing solar panels at home can feel a bit daunting, but breaking it down into simple steps makes it manageable. First things first, gather your tools. You’ll need a drill, a level, wrenches, and a socket set. Make sure to check your solar panel kit for any specific tools you might need.
Next, find the right spot for your solar panel installation. Look for a location on your roof that gets plenty of sunlight throughout the day. Clear away any obstructions like branches or antennas that might cast shadows on your panels. It’s crucial for them to soak up as much sun as possible to maximize efficiency.
Once you've picked the ideal spot, it’s time to mount the solar panels. Start by securing the mounting brackets to your roof in accordance with the manufacturer's instructions. Use a level to ensure everything is straight. Once the brackets are in place, carefully attach the panels to these mounts. Double-check that everything is tight and secure.
After mounting, connect the electrical wiring. This part can be tricky, so follow the wiring guide provided with your solar panel installation kit. Make sure to connect the positive and negative wires properly to avoid any mishaps. If you're unsure, don’t hesitate to call in a professional.
Finally, connect the inverter and any necessary monitoring equipment. This step converts the solar energy into usable electricity for your home. Once everything is hooked up, turn on your system and enjoy the benefits of solar energy!
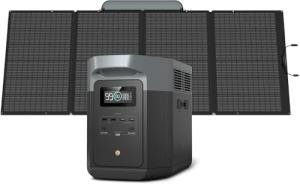
EF ECOFLOW DELTA 2 Max Portable Solar Generator
Power your adventures with this lightweight solar generator that keeps your devices running wherever you go
Product information
$1,243.00
Product Review Score
4.17 out of 5 stars
104 reviewsProduct links
Maintaining Your Solar Panels for Longevity
Keeping your solar panels in good shape is super important for long-term performance, especially after your solar panel installation. A little TLC goes a long way in maximizing efficiency and ensuring you get the most energy from them.
First off, check for dirt, leaves, or any debris resting on your panels. Dust can block sunlight and reduce efficiency. A gentle rinse with a hose usually does the trick. Just make sure to do it on a cool day to avoid streaking. If you live in a particularly dusty area, a more thorough cleaning a couple of times a year can really help.
Next, inspect for any damage regularly. Look for cracks or signs of wear and tear. If you see something concerning, don’t hesitate to call a professional to take a closer look. Keeping an eye on how the panels are performing can also give you clues. If you notice a drop in energy production, it might be time to investigate further.
Finally, clear away any nearby trees or tall structures that could throw shade. Keep the area around your panels free from overhanging branches. Sunlight is everything for your solar panel installation, so the less shade the better! A little prevention can ensure your investment shines bright for years to come.


