
Start with the efficiency of the solar panels. This tells you how much sunlight they can convert into electricity. High-efficiency panels are great for smaller roofs or limited space. If you have plenty of roof space, you might opt for slightly less efficient models that are typically more affordable.
Next, consider the type of solar panel. Monocrystalline panels are known for their sleek design and efficiency, while polycrystalline panels are budget-friendly and work well when you have room to spare. There are also thin-film panels, which are lightweight and flexible but usually less efficient. Each type has its pros and cons, so pick one that fits your needs.
Don’t forget about warranties! Check how long the manufacturer covers the panels. Most reputable brands offer warranties ranging from 10 to 25 years. A solid warranty can save you money on potential repairs in the long run. When diving into solar panel installation, awareness of durability is key!
Lastly, think about your location. If you live in an area with lots of sunlight, make sure the panels can capture that energy effectively. A good installer will help you assess the best options based on where you live. Choosing the right solar panels can take some research, but it’s a big step towards a greener and more cost-effective future.
Preparing Your Roof for Installation
Getting your roof ready for solar panel installation is super important. You want to make sure your roof can handle those panels and that everything will be nice and secure. First things first, check the condition of your roof. If you have any missing shingles or water damage, it’s a good idea to fix those issues before installing solar panels. A sturdy roof means your solar panels will last longer and work more efficiently.
Next, think about the amount of sunlight your roof gets. Ideally, you want to install your panels on a section that gets plenty of sun throughout the day. Take a look at any nearby trees or buildings that might cast shadows. If something is blocking sunlight for part of the day, it could cut down on how much energy your panels produce. You might need to do some trimming or even consider another part of your roof.
Finally, if you're planning on hiring a professional for your solar panel installation, go ahead and check the roof’s structure. Make sure your roof can support the weight of the panels and any racking system. Professionals can usually help with this assessment, but it’s good to have a basic understanding. A reliable roofing company can also guide you on any repairs needed before installation.
By taking these steps to prepare your roof, you can feel confident that your solar panel installation will go smoothly. You’ll be set up for a cleaner, more efficient energy source in no time!

Anker SOLIX C1000 Portable Power Station & Solar Panel
Get portable power anywhere with this solar panel and power station combo that keeps your devices charged on the go
Product information
Product Review Score
4.77 out of 5 stars
106 reviewsProduct links
Step by Step Installation Guide
Getting started with solar panel installation might seem a bit daunting, but it's actually pretty straightforward if you break it down into smaller steps. Let’s simplify the process!
First things first, pick a good spot for your solar panels. You want a place with plenty of sunlight and minimal shade from trees or buildings. Typically, roofs are the best option, but you can also set up ground mounts if you have the space. Make sure the area is clear and accessible, so you can work efficiently.
Next, gather your tools and materials. You'll need some basic equipment like a drill, screws, a ladder, and safety gear. Don't forget your solar panels, mounting brackets, and an inverter to convert the solar energy into usable power. Having everything on hand will make your solar panel installation go smoothly.
Now it’s time to get down to business! Start by attaching the mounting brackets to the chosen surface. Make sure they're secure and properly spaced based on the instructions. Once the brackets are up, gently place the solar panels onto them. Connect the panels to each other and to the inverter according to the manufacturer's guidelines. This part can be a bit tricky, so take your time to ensure everything is connected correctly.
Finally, test your system. Turn it on and check for issues. Maybe grab a buddy to help you monitor the output. If everything looks good, congratulations! You just completed your solar panel installation. Now, sit back and enjoy the energy savings and benefits of going solar!
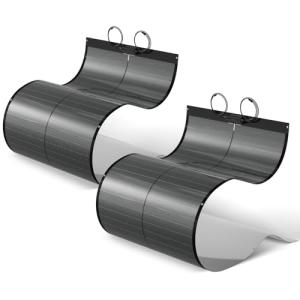
BougeRV 400W Flexible CIGS Solar Panels - 2 Pack
Maximize your energy efficiency with lightweight and versatile solar solutions perfect for any outdoor adventure
Product information
$1,119.99
Product Review Score
4.09 out of 5 stars
159 reviewsProduct links
Maintaining Your Solar Panels After Setup
Once you finish your solar panel installation, you might think the hard part is over. Not quite! To keep your panels running smoothly, a bit of maintenance goes a long way. It’s easier than you might expect, and it’s key to maximizing your energy production.
First off, check your panels regularly for dirt, dust, or debris. A quick rinse with water can keep them clean and efficient. If you live in a particularly dusty area or near lots of trees, aim to give them a good wash at least a couple of times a year. If you don’t feel like climbing onto your roof, consider hiring a pro to do it for you.
Next, keep an eye on the performance. Most solar systems come with monitoring apps or tools. These help you spot any dips in energy production. If you notice something off, it’s time to call in a technician to check things out. Early detection can save you from bigger issues down the road.
Don’t forget about the surrounding area, too. Trim back any branches or plants that might cast shadows on your panels. Even the smallest shadow can affect how much energy your system generates. And while you’re at it, make sure there’s no debris like leaves or snow blocking the panels. A clear path to sunshine is essential for optimal performance.


