
First off, figure out how much energy you use. Check your electric bills for the last year to see your monthly average. This will help you know how many panels you might need. Remember, the more energy-efficient your home is, the fewer panels you’ll require.
Next, check out different types of solar panels. There are a few options on the market, like monocrystalline, polycrystalline, and thin-film panels. Each has its pros and cons, so do a bit of research. Think about your budget, space, and energy needs when choosing the right type.
Once you know your energy needs and the type of panels you want, it's time to look into installation. You can either DIY or hire professionals. If you’re handy and feel confident, installing them yourself can save cash. But, if you’re unsure, going with a pro is a smart move. They’ll handle all the tricky stuff and make sure everything’s up to code.
Finally, don’t forget about permits and incentives! Many local governments offer tax credits and rebates for solar panel installations, which can help you save a ton of money. Check your local regulations and see what's available. Getting all of this sorted will make your Solar Panel Installation process a breeze.
Essential Tools for Installation
Getting ready for your solar panel installation? You’ll need a few essential tools to make the process smooth and straightforward. Here's a quick rundown of what you'll want to have on hand before diving in.
First up, a good drill is your best friend. You’ll need it for securing the solar panels to your roof or mounting brackets. A cordless drill makes it easier to move around, and you'll appreciate not being tethered to a wall. Also, don’t forget to have plenty of drill bits on hand; they help get through different materials like wood and metal.
Next, you’ll need a ladder. Safety is key when you're up high, so choose a sturdy ladder that can support your weight and reach your roof. Make sure it’s positioned on stable ground to prevent any accidents. You might also want to have a friend nearby, just in case you need an extra set of hands.
Wire cutters and strippers are another must-have for solar panel installation. You'll use them to cut and strip wires as you connect everything. Having these tools nearby makes the electrical connections much easier. Lastly, don’t forget safety gear like gloves and goggles to keep yourself protected during the installation.
By gathering these essential tools ahead of time, you’ll be well-prepared for your solar panel installation. Everything will go a lot smoother, and you’ll be one step closer to enjoying those energy savings!
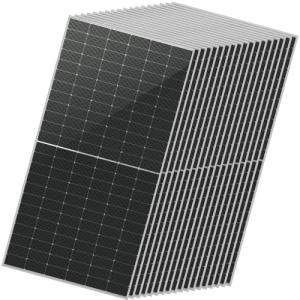
SUNGOLDPOWER 18PCS Bifacial 560W Solar Panels
Get efficient energy generation with these powerful and versatile solar panels designed for optimal performance
Product information
$4,300.00
Product Review Score
4.55 out of 5 stars
85 reviewsProduct links
Step by Step Installation Process
Starting your solar panel installation journey is exciting! Follow these simple steps, and you’ll be harnessing the sun’s energy in no time.
First, gather your materials. You’ll need solar panels, mounting brackets, wiring, and tools like a drill and a ladder. Make sure to have everything ready so you don’t find yourself running back and forth. A plan is always helpful, so outline where the solar panels will go on your roof.
Next, set up the mounting brackets. These brackets will hold your solar panels in place, so make sure you install them securely according to the instructions. Use a level to ensure everything is straight. This step is crucial for stability and performance.
Now it’s time to install the solar panels themselves. Attach each panel to the mounting brackets, following the manufacturer’s guidance. Be gentle but firm, as you don’t want to damage the panels. After they’re secured, connect the wiring. Double-check your connections to ensure they are tight.
Finally, connect the solar panels to your inverter and check your setup. This device converts the solar power into electricity for your home. Once everything’s hooked up, give yourself a pat on the back! You’ve just completed your solar panel installation and are on your way to enjoying renewable energy!
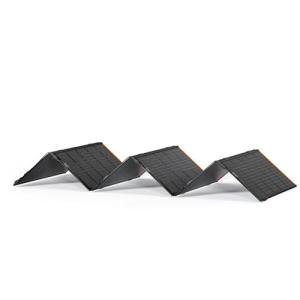
Jackery SolarSaga 500W Waterproof Portable Solar Panel
Lightweight and powerful, this portable solar panel keeps your devices charged wherever you go
Product information
$999.00 $799.00
Product Review Score
4.67 out of 5 stars
184 reviewsProduct links
Maintaining Your Solar Panel System
Once you've completed your solar panel installation, it’s time to talk about keeping everything in tip-top shape. Regular maintenance ensures your panels perform efficiently and last for years. Don't worry; most maintenance tasks are simple and can even be done by you!
Start by giving your solar panels a good rinse every few months. Dust, leaves, and bird droppings can build up and block sunlight. If you live in a dusty area or have lots of trees nearby, be sure to clean them more often. Just use a hose or a soft brush with water—no need for fancy cleaners!
Also, keep an eye on your system’s performance. Some solar inverters come with handy apps that let you check how much energy your panels are producing. Regular monitoring helps you spot any drops in performance early. If you notice something off, it might be time to call in a professional.
Lastly, don’t forget about the surrounding area. Trim any trees that might cast shadows on your panels. And if you spot any loose connections or damaged wiring, get those fixed ASAP. Keeping everything tidy outside supports the performance of your solar panel installation and keeps your investment safe!


