
If you're diving into solar panel installation, it's helpful to grasp some basics. Solar panels convert sunlight into electricity, which means you can generate your own power. This not only lowers your utility bills but also gives you a little independence from the grid.
There are mainly two types of solar panels you'll encounter: monocrystalline and polycrystalline. Monocrystalline panels are black, sleek, and often more efficient. They take up less space and last longer, making them a popular choice if you have limited roof space. On the other hand, polycrystalline panels are blue and a bit more affordable, but they usually take more space and have a slightly lower efficiency.
When you’re ready for solar panel installation, don’t forget about the other components you'll need. Besides the panels, you'll need an inverter, which converts the energy your panels collect into usable electricity. You might also want a battery storage system to keep some energy on hand for those cloudy days.
Thinking about the orientation and angle of your panels? That’s super important too! Ideally, the panels should face south, and the angle can usually be between 15 and 40 degrees, depending on your location. This ensures you capture as much sunlight as possible throughout the year.
Choosing the Right Solar Panels
Next, consider the different types of solar panels available. You’ve got monocrystalline, polycrystalline, and thin-film options to choose from. Monocrystalline panels are known for their efficiency and sleek look, making them a popular choice. Polycrystalline panels are generally more affordable but can be slightly less efficient. Thin-film panels are lightweight and flexible, which is great for certain applications. Think about where you’ll install the panels, as space and aesthetics can play a big role.
Don’t forget to check the warranty and lifespan of the panels you're considering. Most reputable brands offer warranties that cover performance for 20-25 years. A good warranty is a sign of quality and can save you money on potential replacements in the long run. It's also a smart idea to read reviews and compare products to ensure you’re making a solid investment.
Lastly, factor in your budget. Solar panel installation can have upfront costs, but many find that it pays off quickly with reduced energy bills. Look into financing options, tax credits, or local incentives that could help you save even more money. Choosing the right solar panels isn’t just about finding the cheapest option; it’s about getting the best value for your needs.
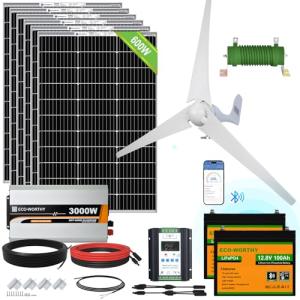
ECO-WORTHY 1000W Solar Wind Power Kit
Unleash clean energy with this powerful solar and wind combo for your home or RV
Product information
$2,199.99
Product Review Score
4.38 out of 5 stars
132 reviewsProduct links
Step by Step Installation Process
Getting your solar panel installation done doesn’t have to be tricky! Here’s a simple step-by-step guide to help you through the process smoothly.
1. Gather Your Materials
2. Choose the Right Location
Your solar panels need to catch as much sunlight as possible. Pick a site that gets sun for most of the day. Clear any obstructions like trees or buildings that might block the sun.
3. Install the Mounting Brackets
Start by securely attaching the mounting brackets to your roof or ground. Use your level to make sure they’re straight. This step is crucial since it supports the entire structure.
4. Attach the Solar Panels
Once the brackets are in place, carefully place the solar panels onto them. Follow the instructions for securing them properly. Make sure each panel connects to the previous one to create a good flow.
5. Set Up the Inverter and Wiring
The inverter converts solar energy into usable electricity. Connect it as per the guide, and do the wiring carefully. Check your connections to ensure everything is safe and ready to go!
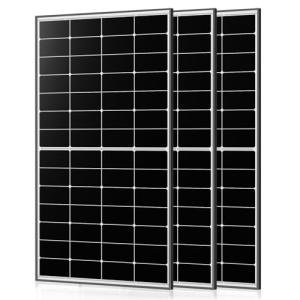
3 High-Efficiency Solar Panels 1200W, 400W, 12/24V
Get ready to harness the sun’s energy and power your home with these top-performing solar panels
Product information
$929.99
Product Review Score
4.41 out of 5 stars
173 reviewsProduct links
Common Mistakes to Avoid
When diving into solar panel installation, many people trip over the same bumps. Let’s spotlight a few common mistakes to keep you on the right track.
First off, not checking your roof's condition can be a real headache. If your roof is aging or needs repairs, it could lead to serious problems down the line. Make sure to assess the state of your roof before installing those panels. You don’t want to deal with leaks or other issues that could arise later.
Another frequent misstep is ignoring local regulations. Each area has different guidelines for solar panel installation. Skipping this step can lead to fines or even having to remove your panels later. Take a few minutes to research what permits you need and get them well in advance.
Also, many folks underestimate the importance of panel orientation and angle. If your panels aren't positioned to catch the most sunlight, you won’t maximize energy production. Make sure they’re tilted just right and facing the best direction to soak up the sun.
Lastly, don’t skimp on quality. Cheap panels might seem tempting, but investing in quality products pays off in the long run. Look for panels that are durable and backed by solid warranties. Quality solar panel installation means you can kick back and enjoy the benefits for years to come.


