
Getting ready for solar panel installation? It’s super exciting! First things first, do some homework. Understand how solar panels work and how they can benefit your home. By knowing the basics, you’ll feel a lot more comfortable in the process.
Next up, check your roof. Is it in good shape? If your roof is older and needs repairs, do that before the solar panel installation. You don’t want to put panels on a roof that might need fixing soon. Also, consider the direction your roof faces. South-facing roofs usually get the most sun, which means better energy production.
Then, think about your energy needs. Check your electricity bills to see how much energy you use. This info will help you figure out what size solar system you need. If you want to go green and save on electricity costs, you’ll want a system that fits your lifestyle well.
Don’t forget permits and local regulations. Some areas require permits for solar panel installation. Make sure you have everything in order because this can delay the process. If you’re not sure, your installer can guide you through the regulations.
Finally, choose a good installer. Look for recommendations, read reviews, and get quotes from a few different companies. A trustworthy installer makes a huge difference in how smoothly your solar panel installation goes.
Choosing the Right Location for Panels
Choosing the right location for your solar panels is super important. It can make a big difference in how much energy they generate. You want to find a spot that gets plenty of sunlight throughout the day. Ideally, that means placing your panels on a south-facing roof or an open area in your yard. If you can’t reach those spots, just make sure to avoid places that have a lot of shade from trees, buildings, or other obstacles.
Think about the angle of your roof too. Solar panels work best when they’re tilted at a certain angle to catch the sunlight. If you have a flat roof, you might need some mounts to adjust that angle. Even just a small tilt can boost efficiency. A lot of solar panel installation guides recommend aiming for somewhere between 30 to 45 degrees.
Another factor to consider is how your panels will be accessed. If you plan to do maintenance down the road, you don’t want to climb over obstacles or struggle with tight spaces. Keep the area around your panels clear and accessible. It’ll save you trouble later and keep everything running smoothly.
Lastly, check local regulations or neighborhood guidelines. Some areas have rules about how visible solar panels can be or where they can go. It’s smart to do your homework before you start with your solar panel installation. This will help you avoid headaches and ensure you can enjoy all the benefits of solar energy without any hiccups.
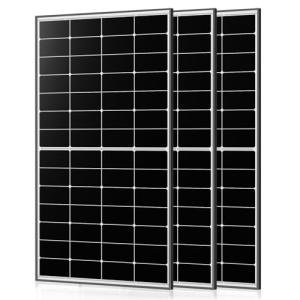
3 High-Efficiency Solar Panels 1200W, 400W, 12/24V
Get ready to harness the sun’s energy and power your home with these top-performing solar panels
Product information
$929.99
Product Review Score
4.41 out of 5 stars
173 reviewsProduct links
Step by Step Installation Process
Installing solar panels might sound tricky, but it’s actually pretty straightforward! Here’s a step-by-step guide to help you with the solar panel installation process.
First up, assess your roof space. Make sure it’s clear of any obstructions like trees or chimneys. You want maximum sunlight exposure! Take some measurements to figure out how many panels you’ll need.
Next, gather your tools and materials. You’ll need solar panels, mounting brackets, wiring, and a few basic tools like a wrench and a drill. Don’t forget your safety gear—better safe than sorry!
Now, it’s time to install the mounting brackets. These will hold your solar panels securely in place. Make sure they're sturdy and positioned correctly. Once those are attached, you can lift the panels onto the brackets and secure them.
After the panels are in place, connect the wiring. Follow the instructions that come with your system. It’s essential to get this part right to ensure everything operates smoothly. Once everything’s hooked up, it’s time to test your setup. Watch those numbers climb as the sun starts to shine! You’ve just completed your solar panel installation!

150W Solar Panel 8-Pack for Home and RV
Get ready to power your home and RV with clean energy and savings using this easy install solar panel kit
Product information
$669.99
Product Review Score
4.75 out of 5 stars
31 reviewsProduct links
Maintaining Your Solar Panel System
Once you’ve taken the plunge with your solar panel installation, it’s important to keep your system in top shape. Regular maintenance ensures that you’re getting the most out of your investment. Luckily, keeping your panels in good condition isn’t a chore; it can actually be pretty straightforward!
First up, check your panels for dirt and debris. Dust and leaves can block sunlight, which means less energy production. A gentle rinse with water can do wonders. You don’t need to climb a ladder for this—most of the time a garden hose will suffice. Just be sure to do this on cooler days to avoid thermal shock.
Next, keep an eye on your inverter. This is the brain of your solar setup, converting sunlight into usable electricity. If you notice any warning lights blinking, take a quick look at the manual to troubleshoot or give a pro a ring if things seem off. A little attention can help catch small issues before they become big headaches.
Lastly, consider scheduling an annual professional inspection. Technicians can spot problems that might fly under your radar. They’ll check the wiring, connectors, and performance of your panels, ensuring that everything runs smoothly so you can enjoy those energy savings year-round.


