
Getting solar panels is a big step, and it’s important to understand what you need before diving in. Think about your energy usage first. Look at your electricity bills and figure out how much power you use each month. This will help you determine how many panels you’ll need. The more energy you use, the more panels you'll want to consider for your Solar Panel Installation.
Next, look at your roof. Is it in good shape? Is it the right size and direction for solar panels? Ideally, you want a roof that faces south for maximum sun exposure, but east or west can work too. Make sure there are no big trees or buildings blocking sunlight. If your roof isn't perfect, don’t worry—ground-mounted systems are an option too!
Don’t forget about your budget. Solar Panel Installation can vary in cost, so it’s crucial to know what you’re willing to spend. Factor in installation, equipment, and any permits you might need. It’s a good idea to get several quotes from different installers. This way, you can compare prices and get the best deal.
Finally, consider any local incentives or rebates. Many areas offer programs that can help lower your costs. Research what’s available in your area to make your Solar Panel Installation even more affordable. The right support can make a massive difference in your solar journey!
Tools You’ll Need for Installation
Getting ready for solar panel installation? Awesome! But before you start, you’ll want to gather a few tools to make the process smooth and hassle-free. Let’s check out what you’ll need.
First up, you'll need a good set of basic hand tools. This means screwdrivers (both flathead and Phillips), pliers, and a wrench set. These are your bread-and-butter tools for any installation job. They’ll help you secure those solar panels firmly and make adjustments along the way.
Next, you'll want a sturdy ladder, especially if you're going to be working on a roof. Safety is key during solar panel installation, so make sure the ladder is stable and reaches your roof easily. A safety harness can also be a great addition if you’re working high up.
Don’t forget a voltage meter. This tool checks the electrical connections to ensure everything is functioning correctly. You definitely want to confirm that your panels are working like they should. Some DIYers like to have a multimeter on hand as well for troubleshooting.
Finally, grab some safety gear: gloves, goggles, and possible dust masks if you're cutting or drilling. It’s always better to be safe than sorry. With these tools lined up, you’ll be ready to tackle your solar panel installation with confidence!
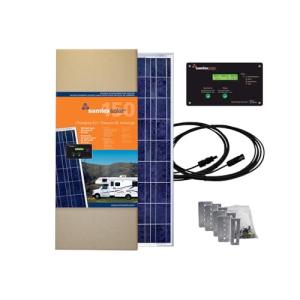
Samlex America SRV-150 Solar Charging Kit
Power up your adventures with this all-in-one solar charging kit designed for reliability and convenience
Product information
$658.63
Product Review Score
4.38 out of 5 stars
195 reviewsProduct links
Step by Step Installation Process
Installing solar panels may sound tricky, but it’s pretty straightforward once you break it down. Let’s walk through the Solar Panel Installation process step by step. You’ll see how manageable it is!
First things first, gather your tools and materials. You’ll need solar panels, mounting brackets, a solar inverter, and wiring. Don’t forget safety gear! After that, check local regulations for permits and guidelines to ensure everything’s good to go.
Next, pick the best spot for your panels. A sunny location on your roof is ideal, but a ground installation works too. Make sure there are no obstacles blocking sunlight. Once you have your location, measure it out and mark where the mounting brackets will go.
Now, it’s time to install those brackets securely. Use a level to make sure everything is straight. After that, you can attach the solar panels to the brackets. Be careful and follow the manufacturer’s instructions closely. It’s usually a matter of sliding them into place and securing them with bolts.
Finally, connect the inverter and the wiring. This part might need a bit of finesse, but just follow the wiring diagram provided by your inverter’s manual. Once everything is hooked up, double-check your connections. Then, flip the switch and bask in the sunshine of your new solar setup. Enjoy the savings!
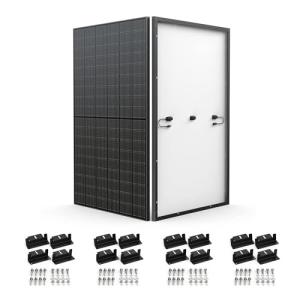
EcoFlow 400W Durable Rigid Solar Panel - 2 Pack
Get dependable solar power for your adventures and home needs with this tough 2 pack of efficient panels
Product information
$1,299.00
Product Review Score
4.35 out of 5 stars
124 reviewsProduct links
Tips for a Smooth Installation Experience
Getting your solar panels up and running should be a fun experience, but a little prep goes a long way. Here are some tips to make your solar panel installation smooth and easy!
First, do some homework before the big day. Know the layout of your roof and decide where the panels will go. Think about sunlight exposure too—better light means better performance! Check out local building codes and get any necessary permits. It’s way easier when everything’s in line before you start.
Next, gather your tools and materials ahead of time. You’ll need basic tools like a drill, screwdrivers, and maybe even a level to get everything lined up right. Having everything at hand saves time. Plus, it keeps stress levels down when you can focus on the installation itself.
Don't hesitate to ask for help. Whether you’re working with a buddy or hiring pros, teamwork can make everything easier. If you’re going DIY, consider watching some online tutorials for extra guidance. There’s a ton of helpful info out there that can boost your confidence.
Finally, check your work as you go. Make sure every panel is secure and correctly positioned. Take your time; it’s better to do it right than rush through. You’ll feel great knowing your solar panel installation is solid and ready to save you money on your energy bills!


