
Thinking about solar panel installation? That’s an awesome choice! Going solar can save you money and is great for the environment. But getting started can feel a bit overwhelming. Don’t worry; I’ve got your back. Let’s break it down simply.
First up, you need to assess your energy needs. Take a good look at your electricity bill to see how much energy you use monthly. This will help you figure out how many panels you'll need. If you have a goal to lower your bills, consider how much solar energy can cover that. Sounds simple, right?
Next, check your roof. Do you have enough space for the panels? Ideally, your roof should face south, but east or west can work too. Also, look for any shade from trees or buildings. If your roof isn’t ideal, you might want to think about ground-mounted panels. They can catch a lot of sun without the shade issues.
Once you have your energy needs and roof situation sorted, it's time to think about local regulations and permits. Be sure to check what’s required in your area for solar panel installation. Some places have specific rules or incentives like tax credits. It’s definitely worth looking into those—who doesn’t love saving a bit of cash?
Finally, get in touch with solar providers. Gather quotes, check reviews, and see what fits your budget and needs best. After you go through these steps, you’ll be ready to make the leap to solar energy!
Choosing the Right Equipment
Next up, you need an inverter. This little device converts the sunlight captured by your panels into usable electricity. A string inverter works well for most systems, but if you have shaded areas on your roof, consider a microinverter or power optimizer. They help maximize the output from each panel, making them a smart choice for complex setups.
Don’t forget about the mounting hardware! A sturdy racking system is essential for keeping your panels secure. Whether you choose a ground mount or a roof mount, make sure it’s designed for your specific roof type and can withstand the local weather conditions.
Lastly, think about batteries if you're interested in energy storage. Having a battery system allows you to save excess energy for use at night or during outages. Brands like Tesla offer reliable options. You should assess how much power you’d like to store and choose a battery that meets those needs.
Taking the time to pick the right equipment can make your solar panel installation smoother and more effective. With the right choices, you’ll enjoy the benefits of solar energy, like lower bills and a smaller carbon footprint.

DJI Power 2000 Solar Generator with 2048Wh Battery
Stay powered up and off the grid with this reliable solar generator featuring a massive battery capacity
Product information
$1,357.00
Product Review Score
4.94 out of 5 stars
228 reviewsProduct links
Step by Step Installation Process
Installing solar panels might sound tricky, but it’s actually quite straightforward when you break it down. Here’s a simple, step-by-step guide to help you navigate the solar panel installation process without getting overwhelmed.
First off, you need to gather your materials. Make sure you have all the necessary tools and equipment. This usually includes solar panels, mounting brackets, a solar inverter, electrical wiring, and safety gear. Double-check everything before you start so you’re not running to the store mid-installation.
Next, plan your installation area. Find a spot on your roof that gets plenty of sunlight—this is crucial for effective solar energy collection. Clear any debris and make sure your roof is in good shape. Check the local regulations and permit requirements, too, so you don't run into any surprises later.
Once you have your site ready, it’s time to set up the mounting system. Attach the brackets securely to the roof, following the manufacturer’s instructions. After that, lay down the solar panels and connect them to the inverter. Don’t forget to wire everything correctly! Be sure to follow the wiring diagrams provided with your equipment.
Finally, it’s time to connect your system to the grid (if applicable) and flip the switch! Keep an eye on the performance for the first few days to make sure everything runs smoothly. With this easy solar panel installation process, you’re on your way to harnessing the sun's power like a pro!
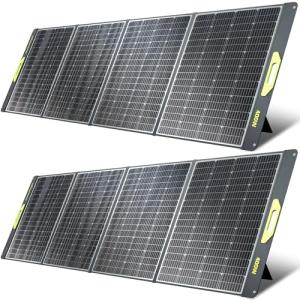
800W Foldable Portable Solar Panel Set for Camping
Get convenient power on your camping adventures with this lightweight and easy-to-set-up solar panel set
Product information
$699.99
Product Review Score
4.95 out of 5 stars
57 reviewsProduct links
Tips for Maintaining Your Solar System
Keeping your solar system in top shape doesn’t have to be a chore. With just a bit of routine care, you can ensure your setup runs smoothly for years. Here are some easy tips to maintain your solar panels after your solar panel installation.
First up, keep an eye on dirt and debris. If you live in a dusty area or have lots of trees nearby, your panels might get a bit grimy. A gentle rinse with water can help. Just make sure to do this early in the morning or late in the afternoon to avoid damaging the panels in direct sunlight. And if needed, a soft brush can give ’em a little scrub to really shine.
Check for any shading issues. If a tree grows tall or a building gets built nearby, it can block sunlight. Regularly assess the situation to ensure your panels stay in the sun. You want maximum sunlight exposure for the best energy production, especially right after your solar panel installation.
Lastly, monitor your energy output. Most systems come with monitoring apps that let you see how much energy your solar panels are generating. If you notice a drop in production, it could mean it’s time for professional maintenance like checking the inverters or ensuring connections are tight. Catching issues early helps keep everything running just as it should!


